Planing with the router
Whether you are a beginner or an experienced woodworker, there are many options when it comes to planing wood and every detail counts. With a router and a face milling attachment, you can achieve excellent results even when milling large and complex workpieces.
In this guide, you will learn what options are available without using a jointer and planer and how you can implement impressive projects. This guide will walk you through selecting the right tools, provide step-by-step instructions , and give professional tips to bring your work to the highest level.


navigation
Here is a summary of the most important things for you:
- Tool selection is crucial: choose the right milling tool and a compatible router, complemented by effective dust extraction.
- Preparation pays off: Prepare the workpiece, the face milling device — designed specifically for your project — and safety precautions thoroughly.
- Pay attention to technique: Pay attention to the milling direction and adjust the speed to minimize tear-outs and improve surface quality.
- Don’t forget to finish: check and sand the surface after milling to protect and refine it.
How can I planer with the router?
Planing is the process of machining the top surface of a wooden workpiece using a router and a special planing tool to plane it and produce a smooth, flat surface.
Preparation: What do I need to mill the plan?
To successfully plan wood, you need some preparation time and a few tools. We recommend these materials / tools:
| material list |
|---|
| Workpiece (solid wood cutting board, tree slice, epoxy resin table…) |
| Extraction / vacuum cleaner |
| Dust mask / safety goggles |
| Stable work table |
| Tools |
|---|
| Clamps / Fixing aids |
| Milling tool / face milling cutter |
| Face milling device |
| Powerful hand router or router |
Instructions: Planing with the router
Step by step to the perfect planing result: Follow our simple instructions to plan uneven solid wood workpieces quickly and easily. We will show you how to use your router, the right cutter and a face milling device to achieve precise results step by step – for projects that impress.
Step 1: Tool selection
Choose a suitable router and milling tool that is suitable for your specific project and the material being machined. Mostly, face milling cutters with 2 or 3 cutting edges and a diameter of 30-40mm are used. There are also tools for face milling with diameters up to 50mm. However, these are only recommended in combination with very powerful routers and a professional planing device such as the SlabMatrix from Sautershop

Discover now in the online shop
Looking for a high-quality router table? In the RUWI online shop you can buy a suitable milling table and discover numerous models to suit your needs.
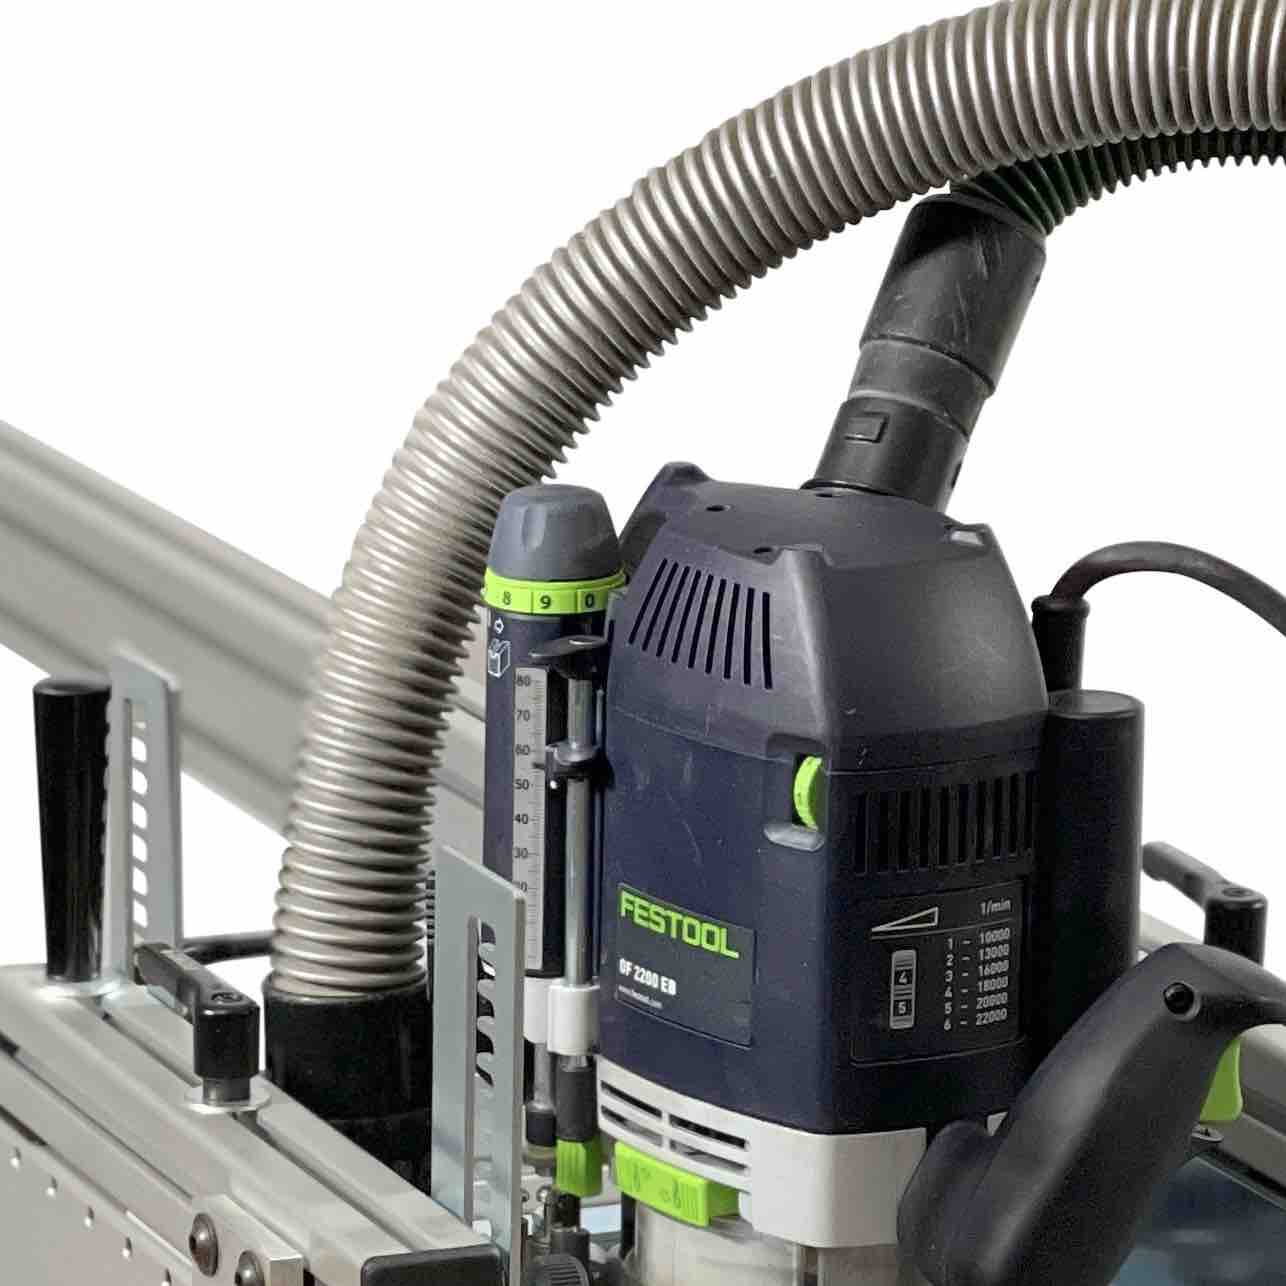
Step 2: Prepare the machine and tools
Check the machine and the cutter for any damage or wear. Then place the face milling cutter at least to the mark (A) on the shaft into the router and clamp the tool tightly. In most cases, the collet nut must be tightened with an open-end wrench. Check that the preset speed on the router is never higher than the maximum speed indicated on the router shank (B). The machine and tool are then placed on the face milling device and, if possible, fixed there.
Notice
Danger! Sharp tool cutting edges, if necessary. wear gloves
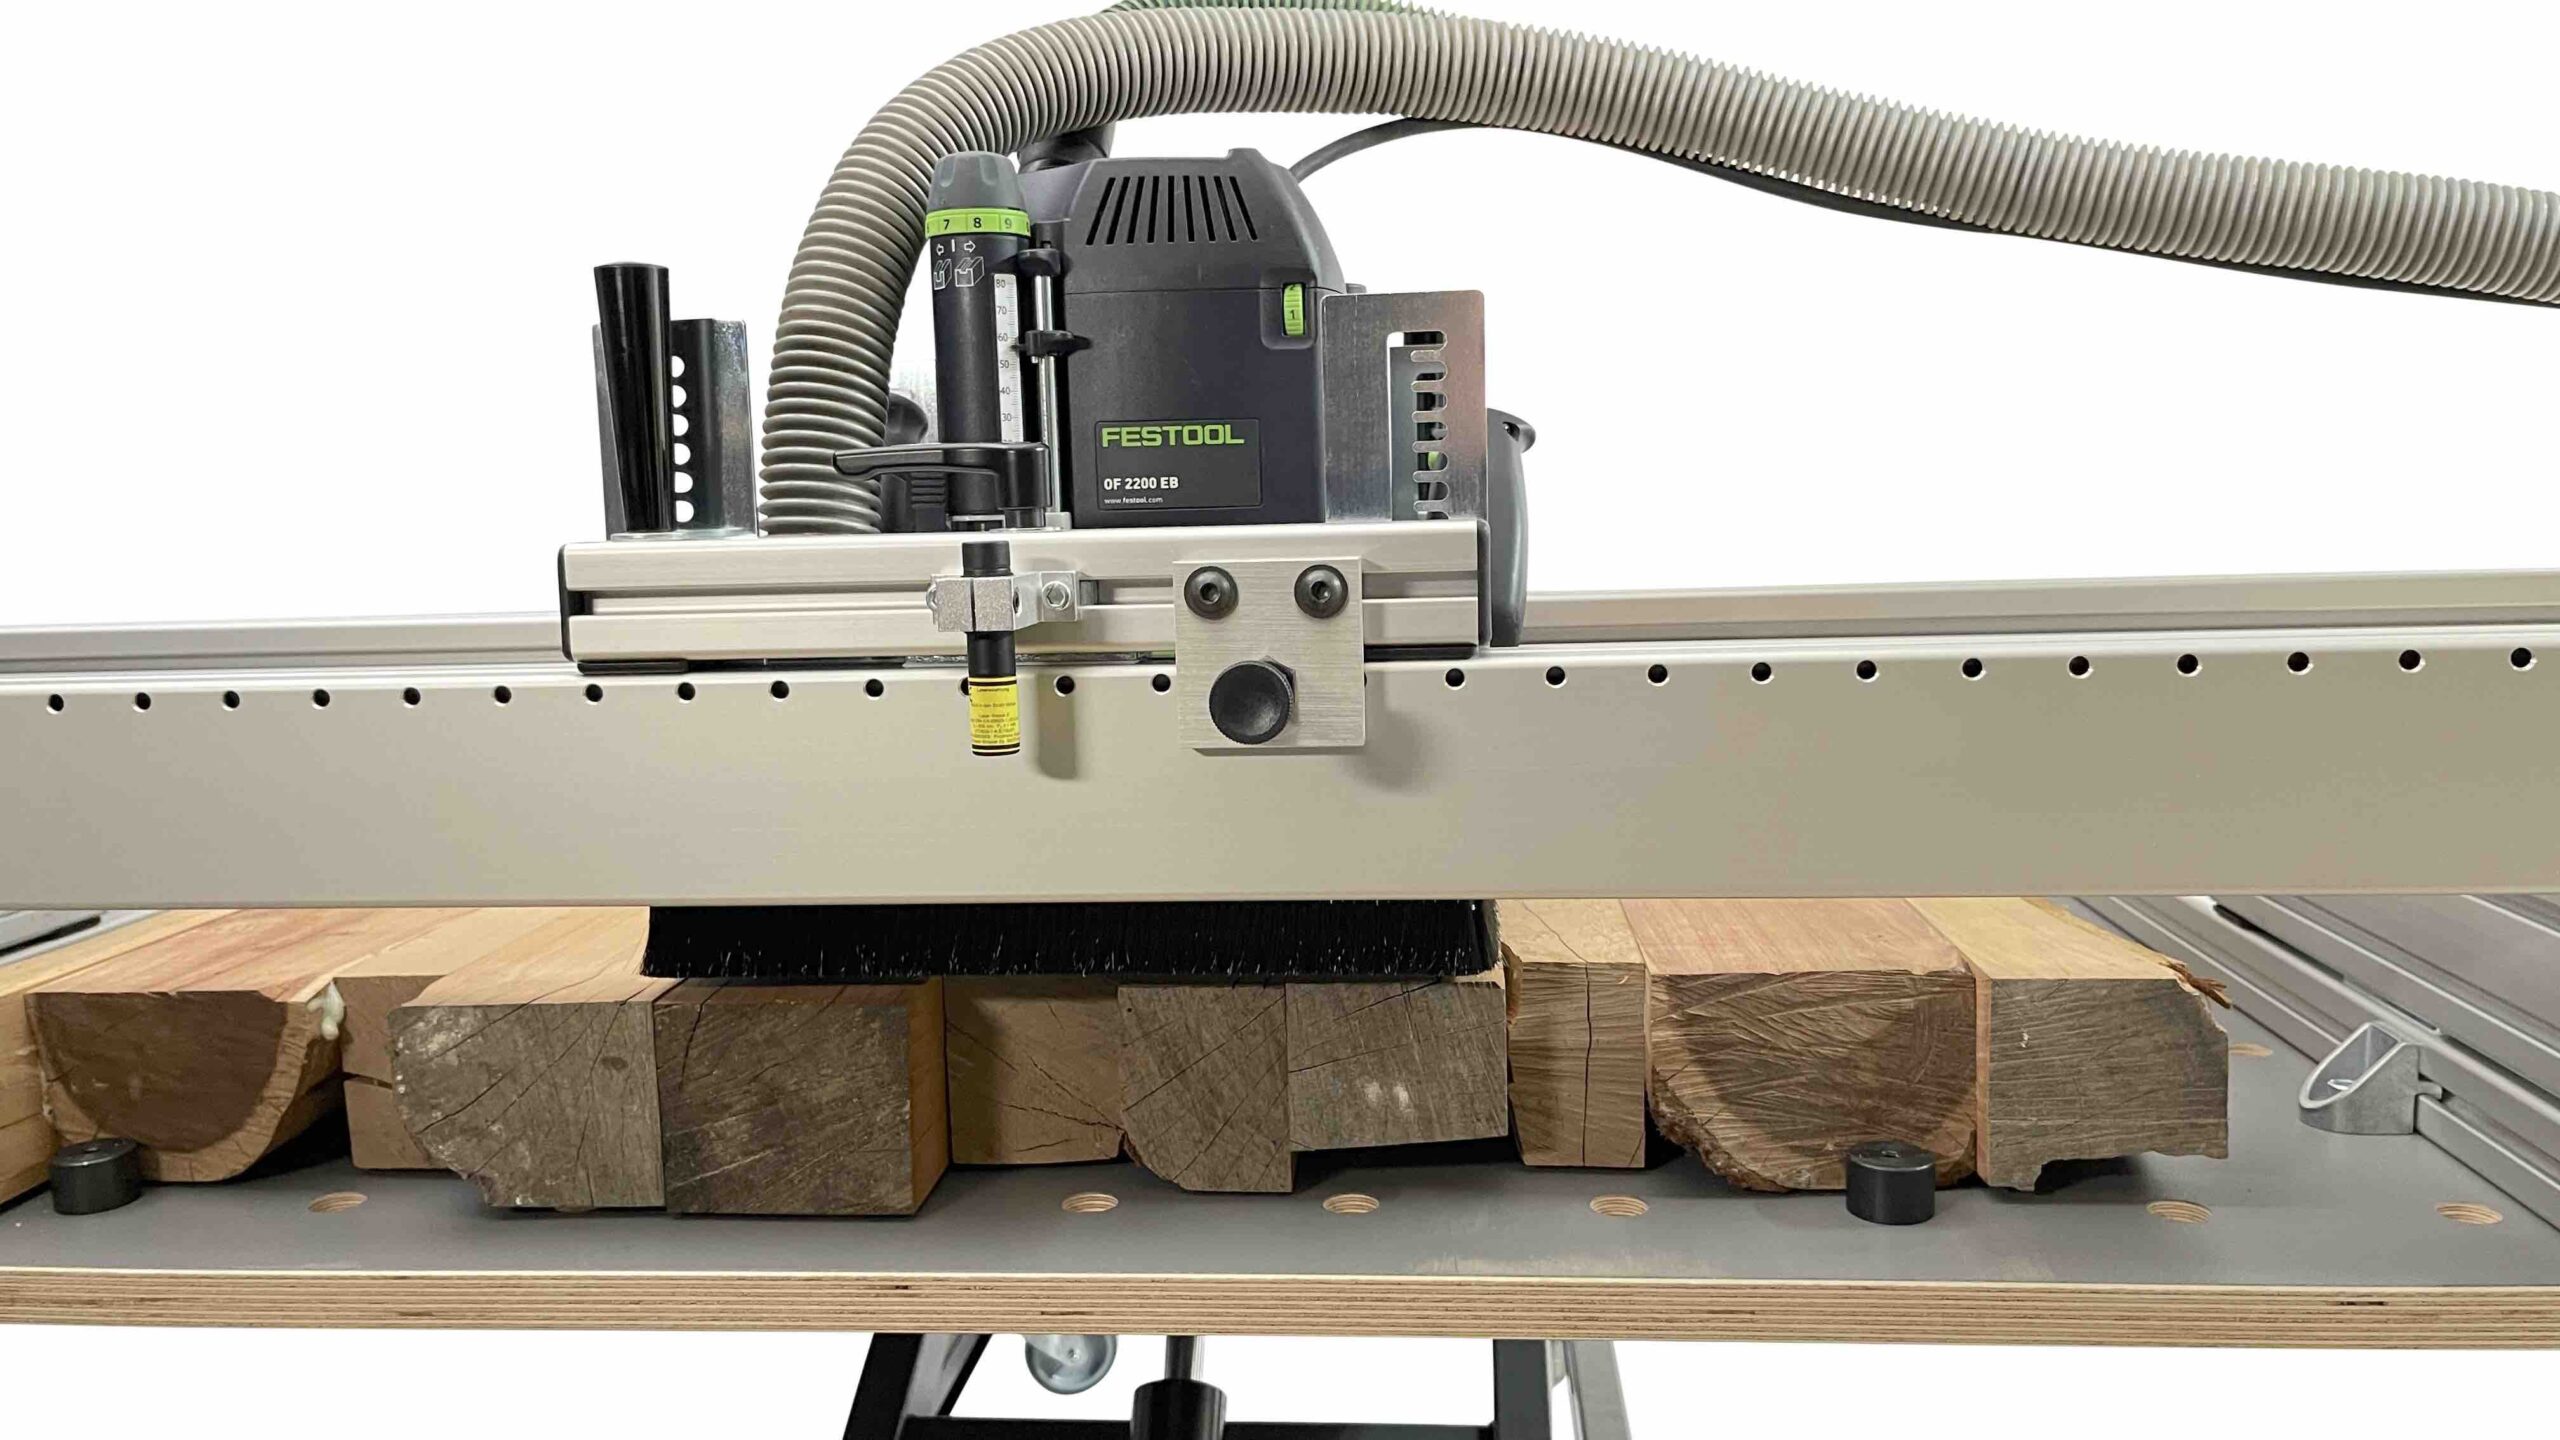
Step 3: Prepare the face milling device
Before you start the actual face milling, it is important to set up your face milling device correctly. Make sure the device is firmly and securely mounted on your work surface. Check the height and alignment settings to ensure precise guidance of the router over the workpiece. Check the guides for cleanliness and smooth movement. If your fixture has adjustable components, adjust them to precisely fit the dimensions of your workpiece. A correctly adjusted and well-functioning face milling device is the key to consistent and accurate milling results and helps to minimize vibrations and unwanted movements during the milling process.

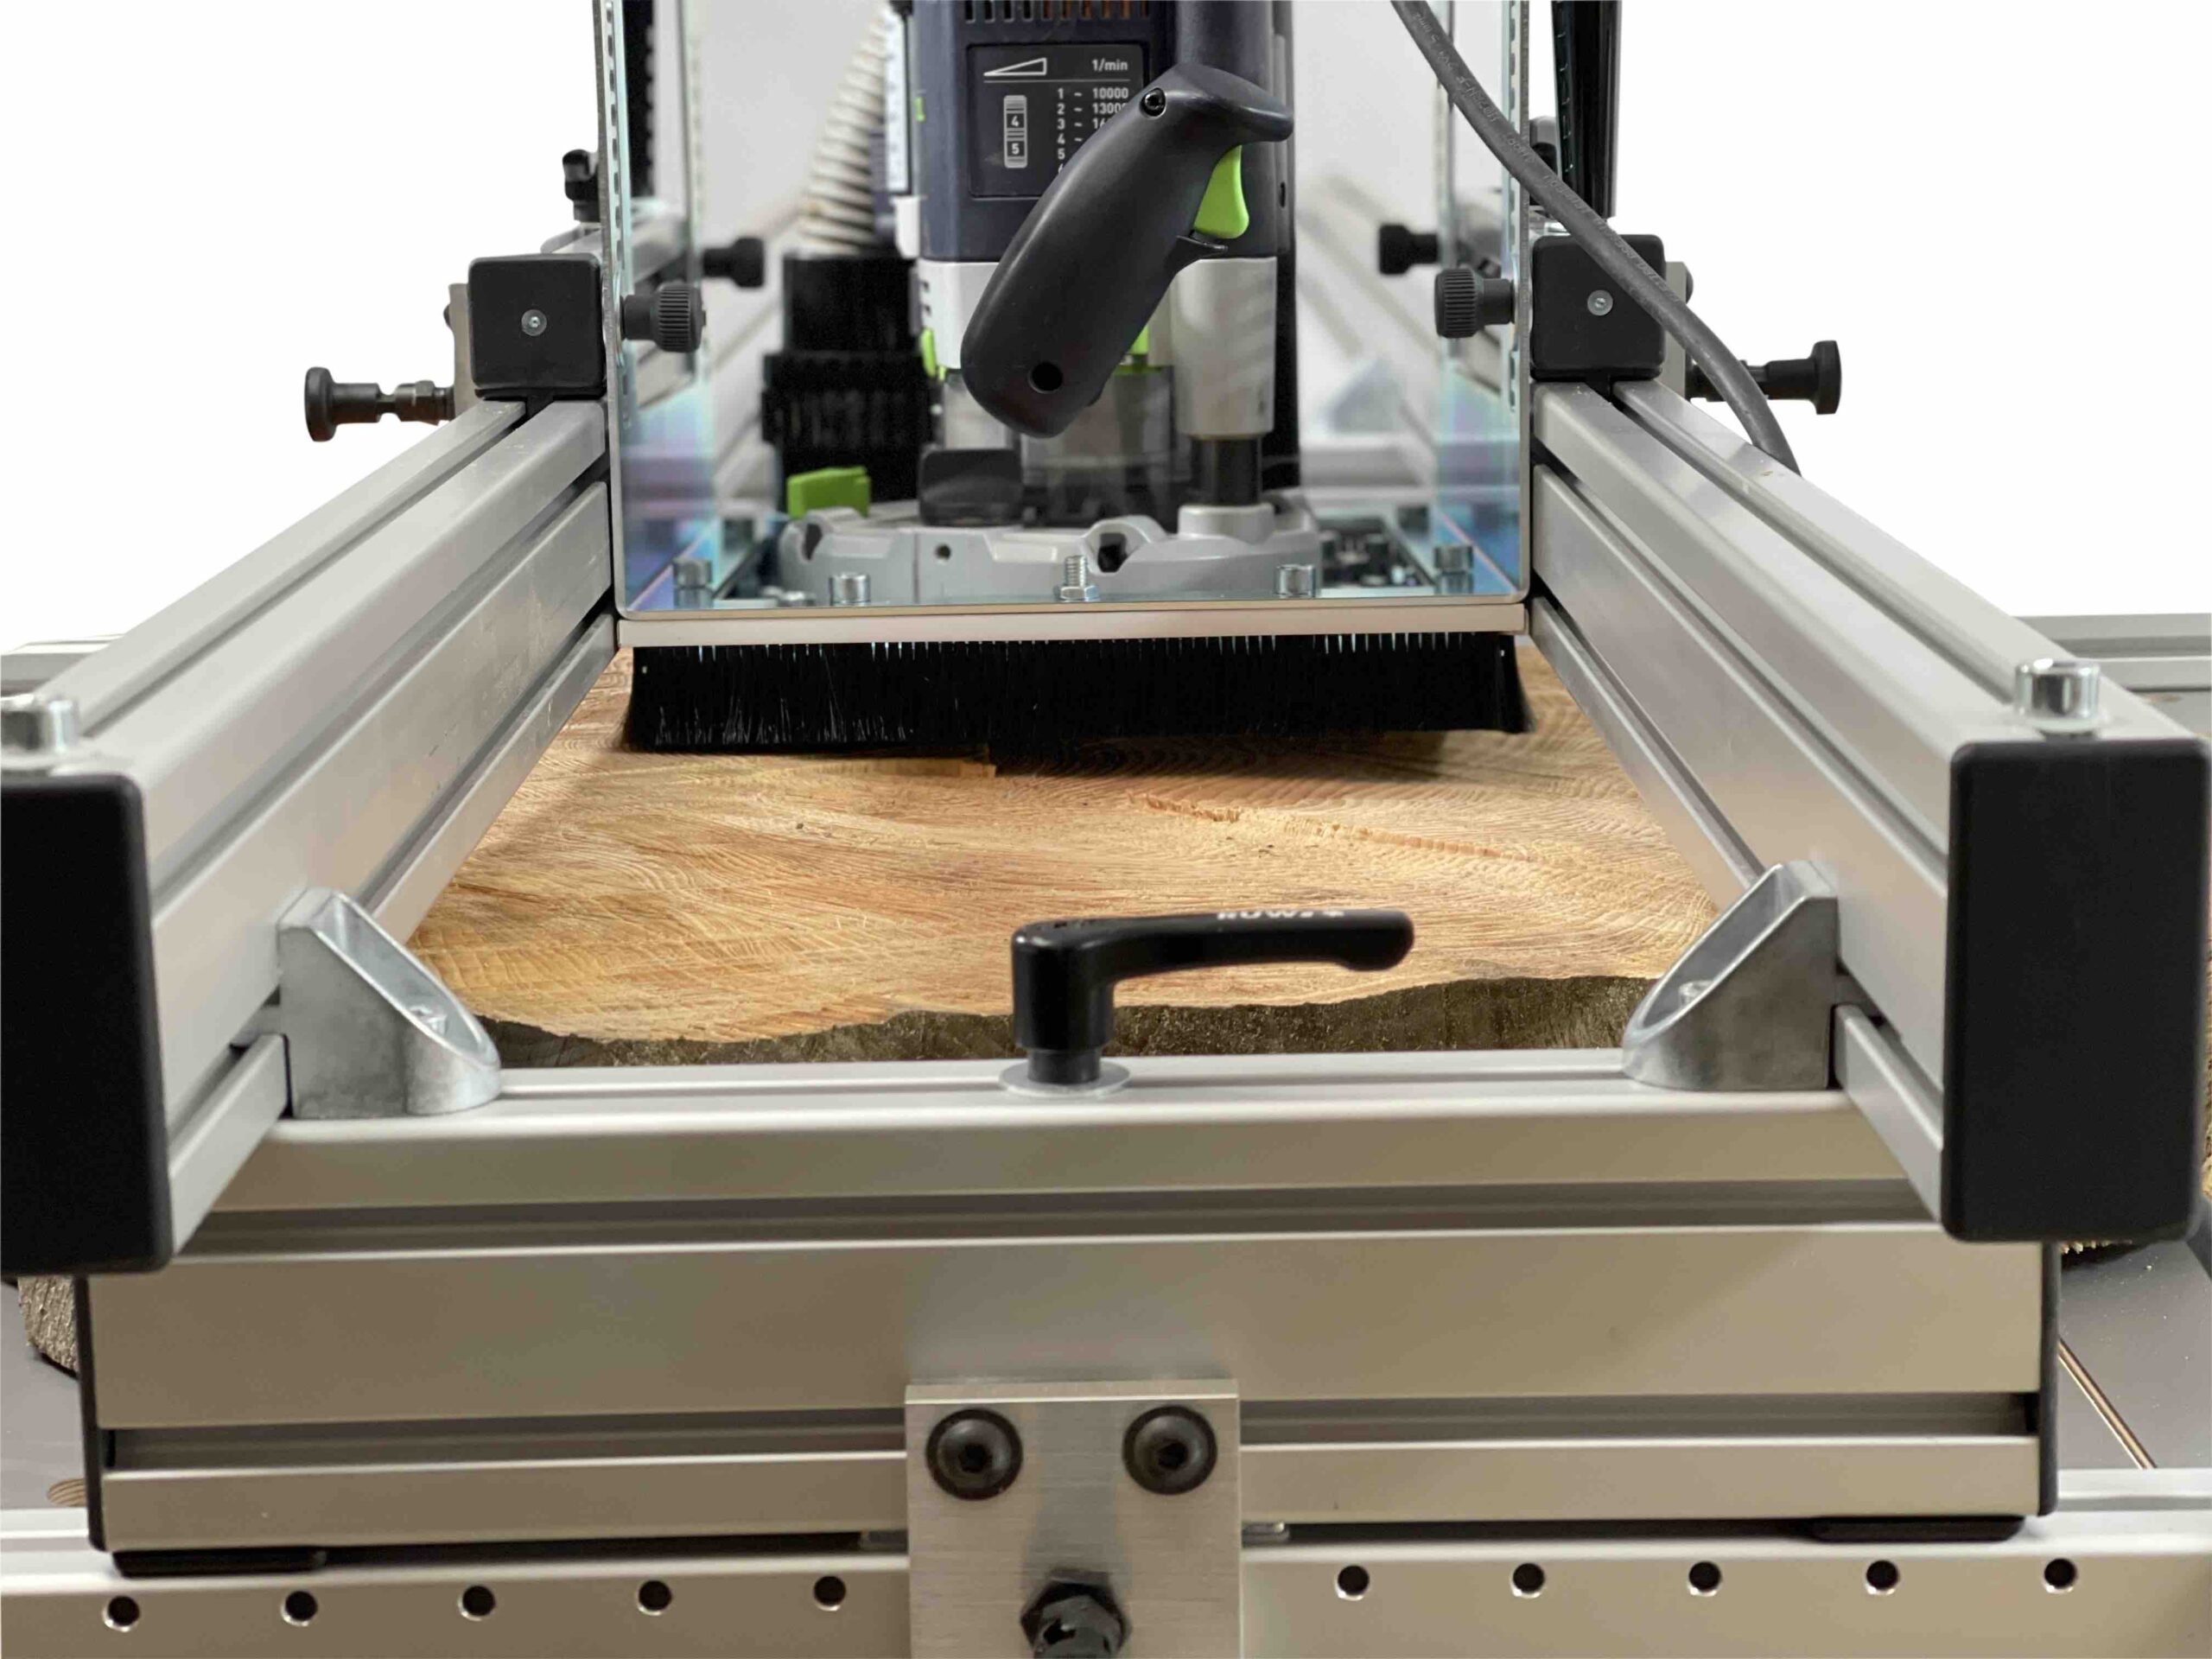
Step 4: Prepare the workpiece
Choose a stable and level work surface. A work table with a non-slip mat or support rails with an anti-slip surface is ideal. Place the workpiece on the table and align it. It may need to be supported in some places to prevent it from wobbling. Use clamps, stops, clamping claws, eccentric clamps or similar to secure the workpiece to the work table. Make sure they are tightened firmly without damaging the material.
When using old wood, it is also important to check in advance that no foreign objects such as screws, nails or similar remain in the wood. These can not only damage the tools but also pose a safety risk.

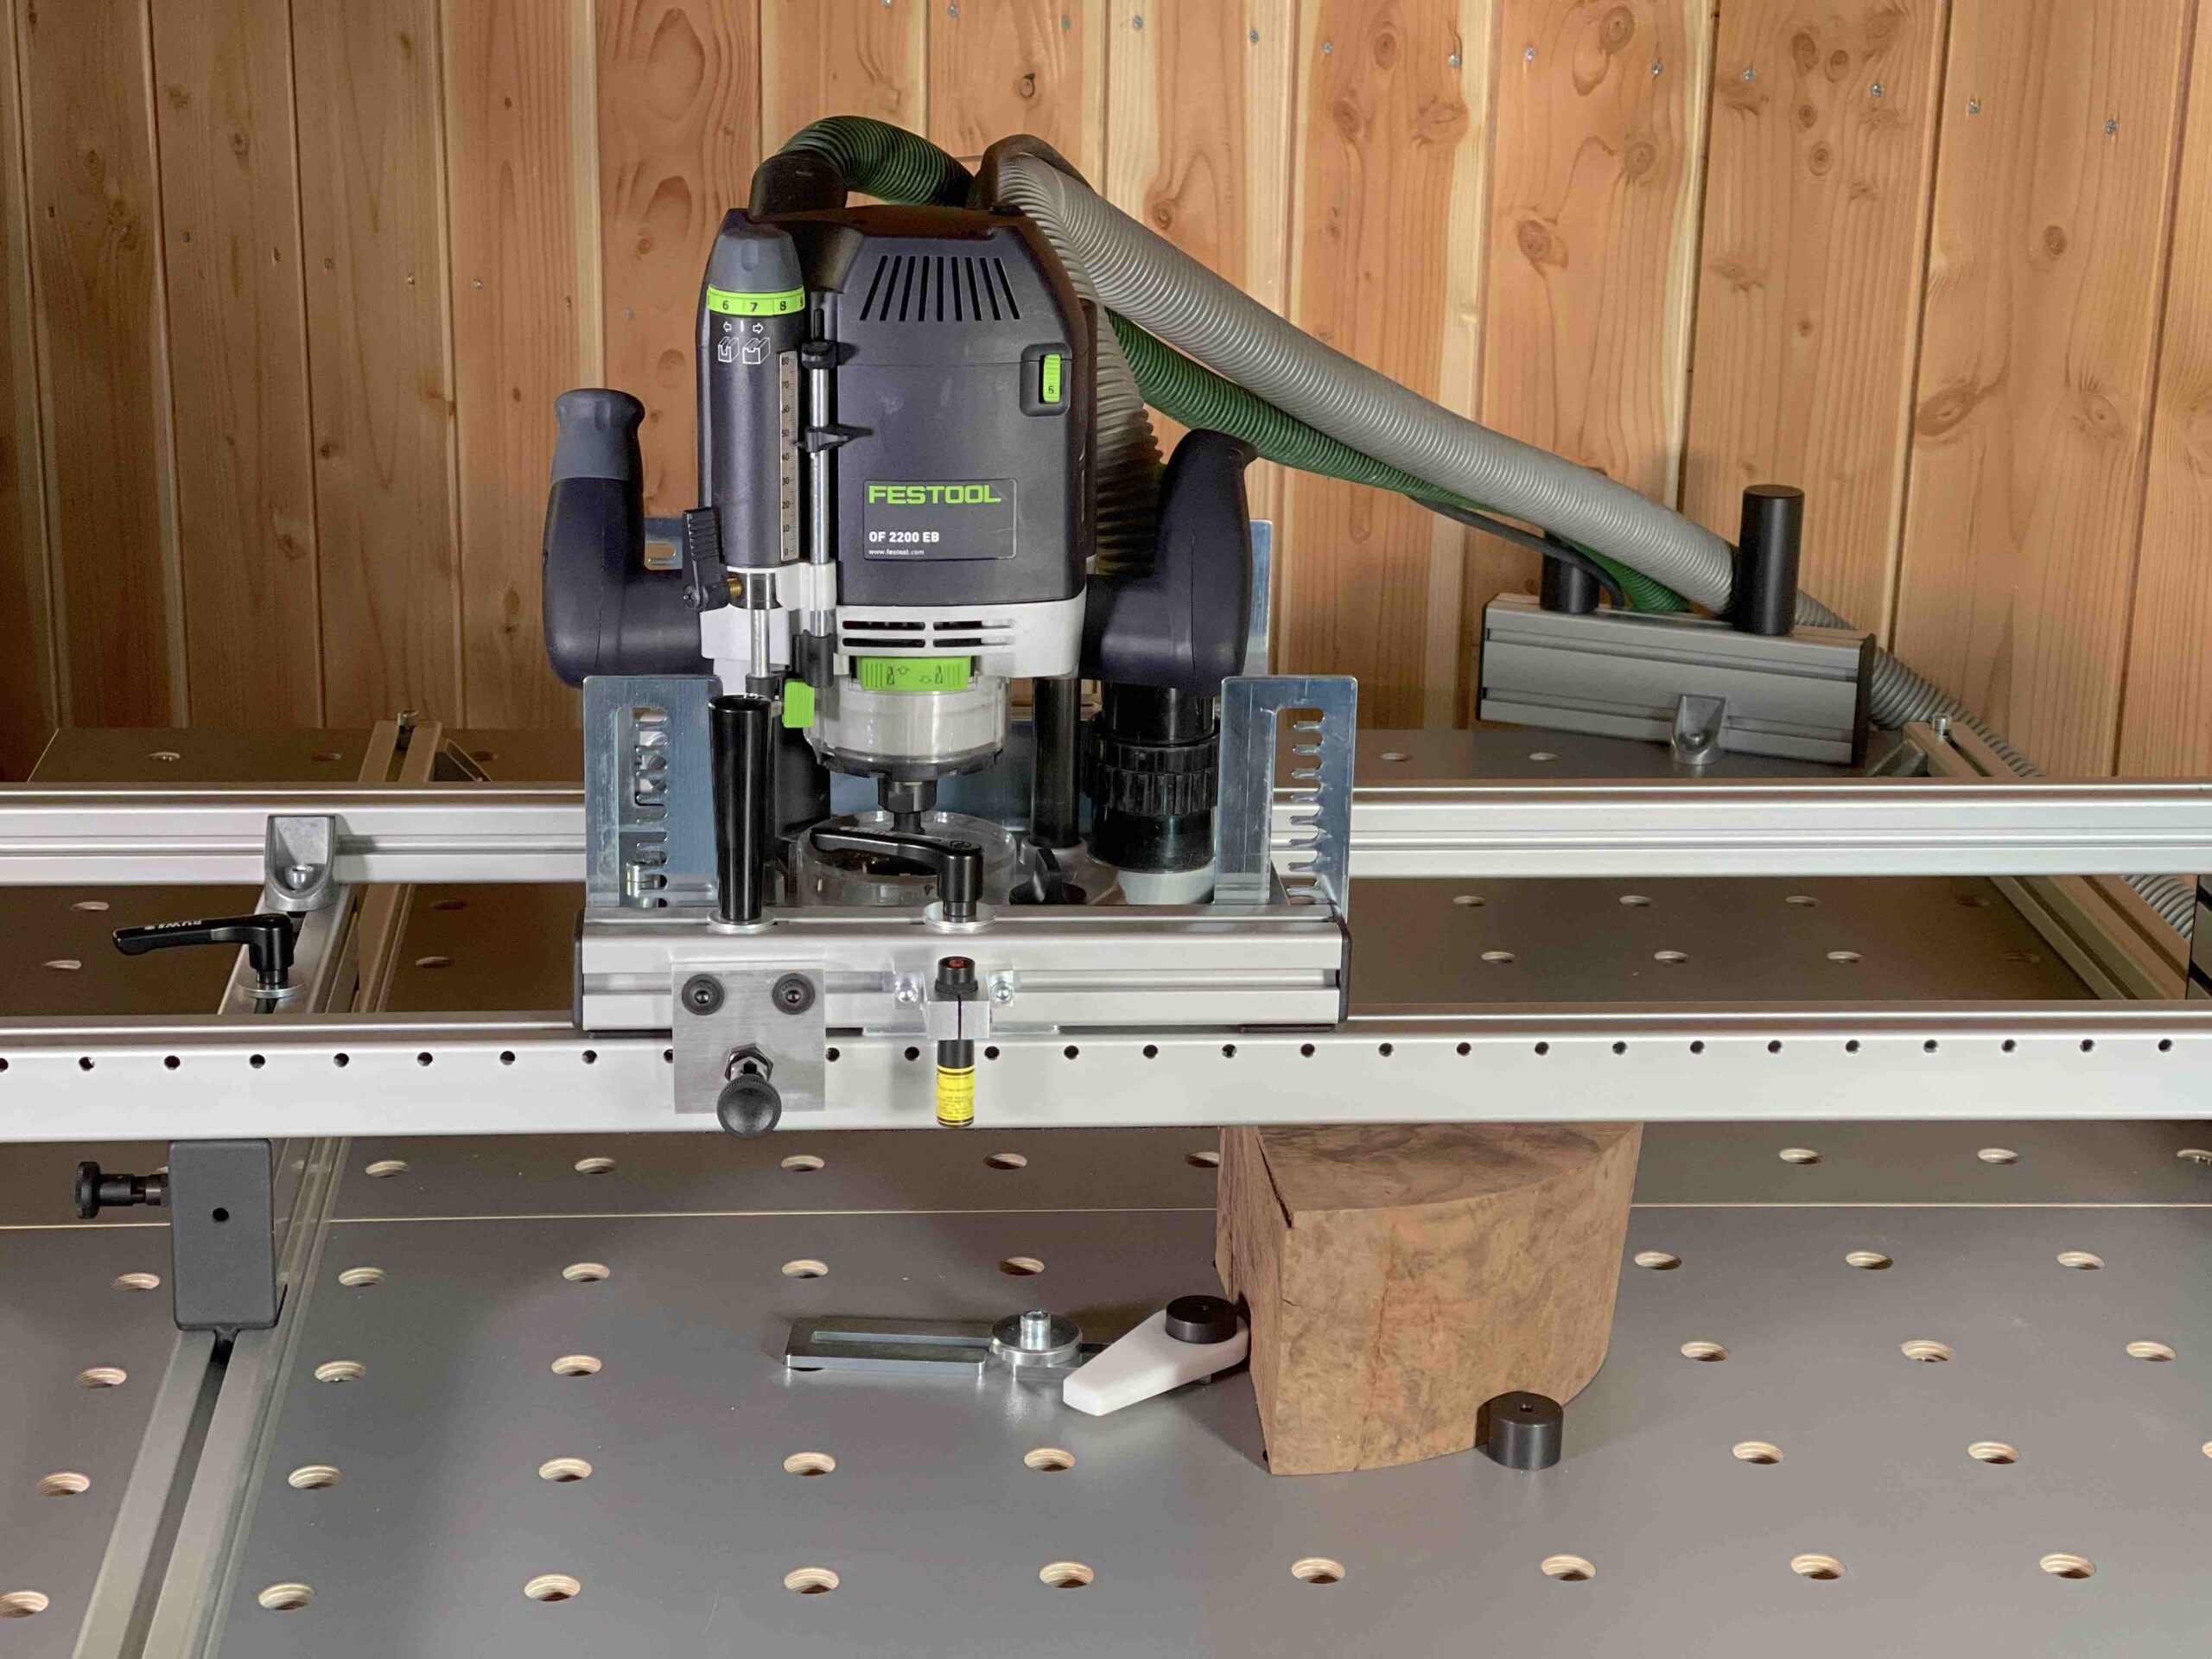
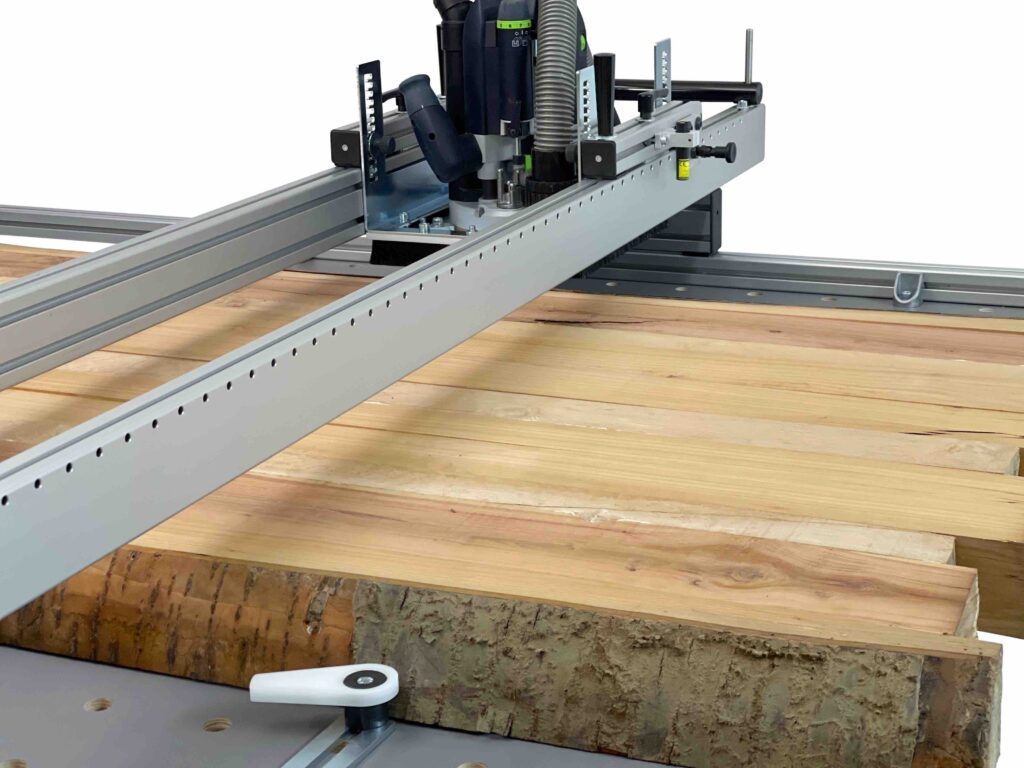
Step 5: Start milling the wood
The milling process is preferably started at the highest point of the workpiece. Always hold the machine firmly and move it at a steady pace in linear paths. When face milling, it is also important to ensure that milling is preferably carried out in the opposite direction.
When a complete partial surface of the still uneven workpiece has been milled flat, the milling cutter is moved downwards by approx. 2-3mm and this is repeated until the entire surface is flat or milled to the correct thickness. However, always make sure that not too much material is removed at once and that the machine is not loaded to its performance limits.
Tip
In the encyclopedia article on milling processes you can learn more about the topic of down-cutting and counter-cutting.

Notice
Planing often produces a lot of chips and wood dust. If possible, please connect dust extraction and use a dust mask
Step 6: Finishing the wood
After planing, it is important to carefully rework the wood. Check the surface visually and haptically for milling grooves and other irregularities. Then sand starting from about grit 100 over 150 to about 220 until everything is smooth. The sanding dust should be thoroughly removed before treating the wood with oil, wax, varnish or glaze. This means your workpiece is perfectly protected and also visually it is on a different level after the surface treatment.
Machines for face milling
Selecting the right machine is crucial for precise and efficient face milling work. Here are the main types:
Handheld routers: These versatile machines are ideal for a wide range of milling tasks, from fine detail work to planing larger surfaces. Handheld routers are available in various power levels, with models with variable speed control offering additional flexibility.
Rod milling machines: Rod milling machines are also often used. These are usually particularly stable and powerful, ideal for planing large wooden panels or machining hardwood. However, there is no way to adjust the height of the rod milling machine. This is then only possible using the face milling device.
Tools for face milling
- 2 or more cutting edges: Milling cutters with two cutting edges are ideal for smaller workpieces with moderate material removal, while three or more cutting edges also remove more material and are therefore ideal for machining larger surfaces.
- Fixed cutters and face milling cutters with reversible blades : Face milling cutters with fixed carbide cutting edges are generally cheaper but must be sharpened when the cutting edges are blunt. Tools with reversible blades offer flexibility because the blades can be easily rotated and replaced when they wear out.
- Shank diameter : It is also important for compatibility with the router that the milling tool fits the collet of the milling machine. Common diameters are 8mm, 10mm and 12mm.
- Tool diameter: Starts at about 25mm and goes up to 50mm. Larger face milling tools typically require a larger shank diameter and a more powerful router to work efficiently.
- The selection of the tool should always be made taking into account the scope of the project and the specifications of your milling machine.
Face milling device
Face milling devices are important for precise face milling work. They vary in complexity and functionality to meet different requirements:
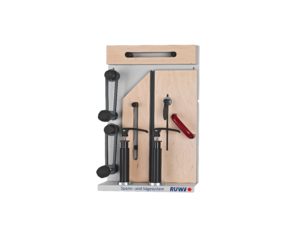
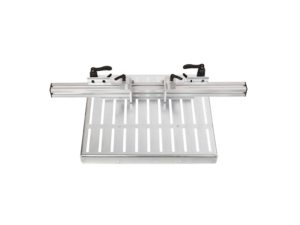
- Simple planing jigs: These are ideal for DIY enthusiasts or smaller projects. They provide a basic but effective guide for the router and are usually easy to use but are generally only suitable for small workpieces. Some of these systems can also be implemented as DIY projects, but work safety must always be taken into account to avoid accidents during later use.
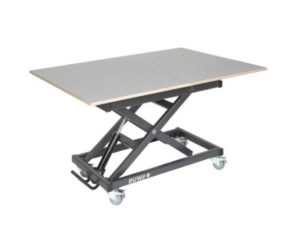
- Professional planing tables : Developed for demanding applications and professional or commercial use, these planing devices offer precise adjustment options, a robust design and often additional functions such as an integrated suction option, convenient height adjustment, movable end stops and a locking function for the production of your own perforated grid tables and grid holes in a 32 mm grid. Due to their stability, they are particularly suitable for larger workpieces and enable particularly precise surface milling.

The choice between a simple or a professional fixture depends on the project requirements, the desired precision and the budget. While simple milling templates may be sufficient for occasional projects and simple applications, professional planer tables offer the stability, accuracy and versatility needed for complex or extensive milling work.
Learn more in the lexicon of woodworking: Planing
FAQ